
If your new Florida home runs on a private well, no agency tests that water for you: the EPA leaves private wells entirely to the owner, which is now you. In your first 30 days, do three things in order, test the water, locate and inspect the system, and learn how it works, so you start out safe instead of guessing.
Why is the well suddenly your responsibility?
On city water, a utility tests and treats your water to federal standards and sends you an annual report. A private well has none of that. The EPA states plainly that it does not regulate private wells and that the owner is responsible for the safety of the water. The day you close on a Florida home with a well, that responsibility transfers to you, whether or not anyone mentioned it.
That is not a reason to panic, it is a reason to get a baseline. More than 43 million Americans rely on private wells according to the EPA, and millions of Florida homes sit over a shallow limestone aquifer that commonly carries hardness, iron and sulfur, as we explain in our complete Florida well water guide. Knowing what is in your specific well is the whole game, and the first 30 days are the right time to find out.
Week 1: test the water and find the system
Your first week sets the baseline. Two tasks matter most:
- Test the water. The CDC and EPA recommend testing every private well for total coliform bacteria and nitrate, plus pH and total dissolved solids. Do this even if a home inspection happened, because inspections rarely include a full water-quality panel. Our guide on whether Florida well water is safe to drink explains why a test, not a taste, is the deciding factor.
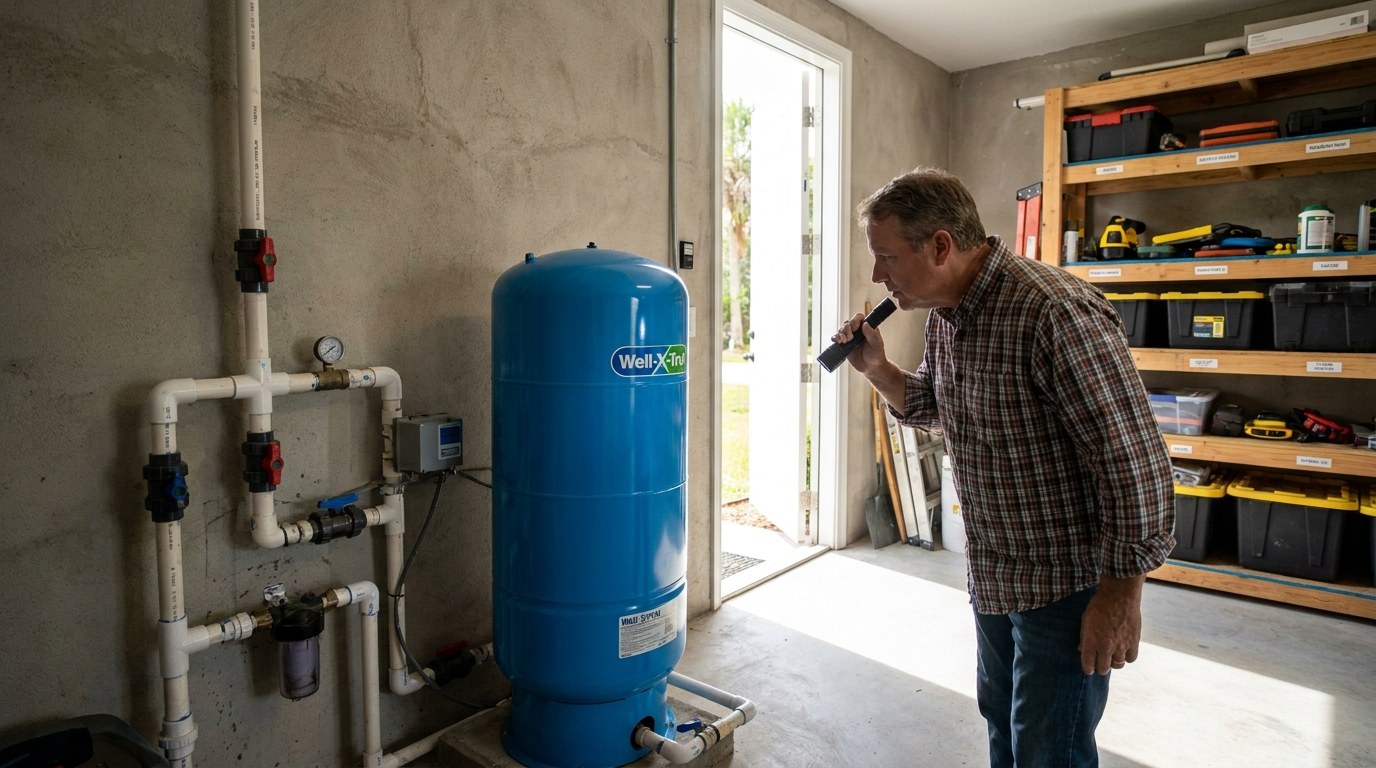
- Locate the well and pressure tank. Find the capped pipe in the yard and trace the indoor plumbing to the pressure tank. Gather any well permit or construction record, which in Florida is filed with the regional water management district.
Week 2: inspect the wellhead and equipment
With the system located, look it over. You are checking that the barriers protecting your water are intact:
| Component | What to check | Red flag |
|---|---|---|
| Well cap and seal | Cap is secure, vented properly, and not cracked or loose | A gap or damage lets surface water and insects in |
| Casing | Extends above grade, no cracks, ground slopes away from it | Water pooling toward the casing after rain |
| Pressure tank | Holds steady pressure, no rust, pump cycles normally | Rapid pump cycling or visible corrosion |
| Existing treatment | Any softener or filter present, with service history | Old, unlabeled or clearly neglected equipment |
| Separation distances | Distance from septic systems and chemical storage | Septic drainfield close to the wellhead |
The CDC recommends that wells sit a safe distance from septic systems and other contamination sources, and that the wellhead be inspected at least once a year. If anything looks damaged or you are unsure of the construction, a licensed well contractor should take a look before you rely on the water long term.

Weeks 3 to 4: learn the system and plan treatment
By the end of the first month, your goal is to stop being a passenger and start being the operator of your own water system:
- Read your test results. A positive coliform result, high nitrate, low pH, or heavy iron each points to a different fix. Our articles on acidic water and orange and brown iron stains translate common results into plain language.
- Set a yearly test reminder. The CDC recommends annual testing for bacteria and nitrate. Put it on the calendar now while you are thinking about it. See how often to test in Florida for the full schedule and the events that trigger an immediate retest.
- Plan treatment around results, not appearance. Florida well water often carries several issues at once, hardness, iron, sulfur, low pH, which is why a single point-of-entry system is usually built to handle a few problems together.
- Know your emergency steps. Hurricanes and floods can contaminate a well in hours, so read what to do after a hurricane or flood before storm season, not during it.
The full first 30 days checklist
- Test for total coliform bacteria and nitrate, plus pH and total dissolved solids.
- Add iron, hardness and sulfur to the panel, common in Florida limestone aquifers.
- Locate the wellhead and the pressure tank, and gather the well permit or record.
- Inspect the cap, casing, tank and any existing treatment equipment.
- Confirm safe separation from septic systems and chemical storage.
- Read your results and map each finding to the right treatment.
- Set a yearly test-and-inspect reminder on your calendar.
- Learn your post-storm disinfection steps before hurricane season.
The honest first step is knowing exactly what is in your water. Our well water treatment page explains how a free in-home test reads your new home's water in about twenty minutes, so your first 30 days end with facts instead of guesses.
Frequently asked questions for new well owners
Does the home inspection during purchase cover the well water?
Usually not in full. A standard home inspection may confirm the pump runs and water flows, but it rarely includes a complete water-quality panel. The EPA and CDC recommend that well owners test independently for total coliform bacteria and nitrate, and Florida DOH advises testing when a property changes hands. Treat a clean closing as a starting point, not proof the water is safe to drink.
What should I test for first in a newly bought well home?
Start with total coliform bacteria and nitrate, the two the CDC and EPA name as the baseline for every private well, plus pH and total dissolved solids. In Florida it is also worth checking for iron, hardness and sulfur, since the limestone aquifer commonly carries them. If anyone in the home is pregnant or there is an infant, nitrate testing is especially important.
How do I find the well and its components if the seller did not show me?
Look for a capped pipe sticking up in the yard, often near the home's exterior, and trace the plumbing inside to a pressure tank, usually in the garage, utility room or a pump house. Check closing documents and any prior well permit, which in Florida is filed with the water management district. If you cannot locate or identify the system, a licensed well contractor can map it for you.
Is there a maintenance schedule I should set up right away?
Yes. The CDC recommends testing private well water at least once a year for bacteria and nitrate, and inspecting the wellhead and equipment annually. Set a yearly reminder now, and add an immediate retest trigger after any flood, nearby land disturbance, or change in taste, color or odor. Our article on testing frequency lays out the full Florida schedule.
The water looks and tastes fine. Do I still need to test?
Yes. The contaminants of greatest concern in well water, coliform bacteria, nitrate and several metals, are invisible, tasteless and odorless. Clear, pleasant water can still fail a bacteria test. Because the EPA does not regulate private wells, no agency is checking for you, so an independent test is the only way to know what your family is actually drinking.
Sources
- U.S. Environmental Protection Agency. Private Drinking Water Wells: owner responsibility and the 43 million figure. epa.gov
- Centers for Disease Control and Prevention. Private Wells: testing schedule, wellhead inspection and well maintenance. cdc.gov
- Florida Department of Health. Private Well Testing program and guidance for new property owners. floridahealth.gov
- University of Florida IFAS Extension. EDIS publications on private well ownership, testing and maintenance in Florida. edis.ifas.ufl.edu
- U.S. Geological Survey. Groundwater and private wells: how aquifers supply household water. usgs.gov